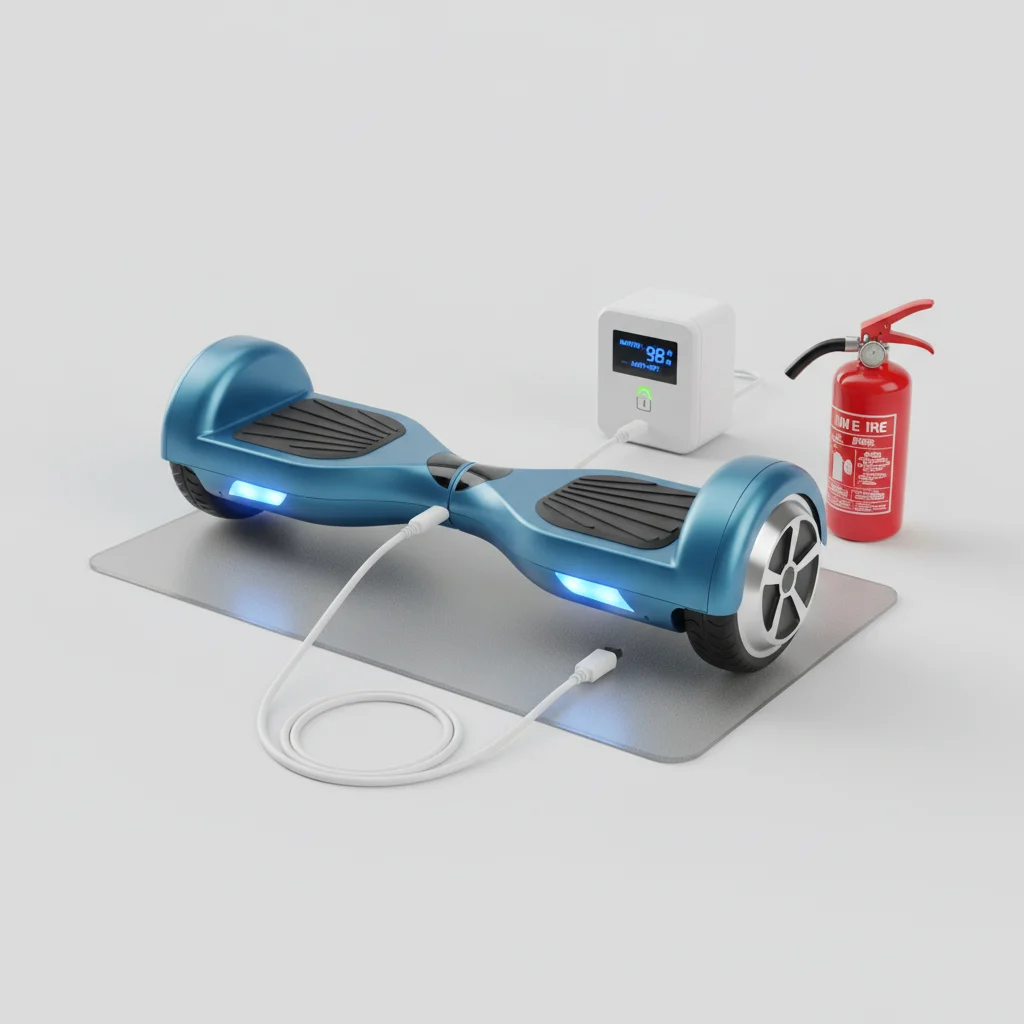
Ensuring hoverboard charging safety is crucial for extending battery life and preventing potential hazards. The most effective way to prevent overcharging and battery damage is to always use the original charger provided with your hoverboard and disconnect it once the charging indicator light turns green, typically after 2-4 hours. Modern hoverboards often have built-in overcharge protection, but relying solely on this can still lead to long-term battery degradation if consistently left plugged in for extended periods.
Understanding Hoverboard Battery Chemistry
Most hoverboards utilize lithium-ion batteries, known for their high energy density but also their sensitivity to improper charging. Overcharging can lead to a phenomenon called lithium plating, where metallic lithium builds up on the anode, reducing capacity and increasing the risk of internal short circuits. This is why adhering to recommended charging times and using compatible chargers is paramount. A damaged battery can not only reduce the hoverboard’s range and speed but also pose a fire risk.
The Role of the Charger in Safety
The charger is more than just a power cord; it’s a sophisticated device designed to deliver the correct voltage and current to your hoverboard’s battery. Using a non-original or incompatible charger can supply incorrect power, leading to overcharging or undercharging, both of which are detrimental. Always check the output specifications of any replacement charger to ensure it matches your hoverboard’s requirements precisely. Look for certifications like UL2272, which indicates the charger has met rigorous safety standards.
Best Practices for Safe Hoverboard Charging
|
Our Picks for the Best Hover Board in 2026
As an Amazon Associate I earn from qualifying purchases.
|
||
| Num | Product | Action |
|---|---|---|
| 1 | K1 Go-Kart Seat Attachment for Self-Balancing Scooters, Adjustable Frame Fits 6.5"/8"/10" Boards, Easy Install, Kids & Family Fun (Scooter Not Included)–Classic Black |

|
| 2 | LIEAGLE Hoverboard, 6.5" Self Balancing Scooter Hover Board with Bluetooth Wheels LED Lights for Kids Adults |
|
| 3 | K2 Self-Balancing Scooter Go Kart with Rear Shock Absorption, Balancing Scooter Seat Attachment for 6.5" 8" 10" Tires, Adjustable Length & Off-Road Wheel( (Not Including Balancing Scooter) |
|
| 4 | Razor Hovertrax 2.0 Hoverboard, UL2272 Certified Self-Balancing Hoverboard Scooter, for Kids Age 8+ |
|
| 5 | Gyroor Self Balancing Scooters Seat Attachment - Go Kart Conversion for 6.5'' to 10'' Self Balancing Scooters, Adjustable Frame Length, Perfect for Kids and Adults |
|
| 6 | Hover-1 My First Self Balancing Scooter for Kids with 5 mph Max Speed, Dual 150W Motors, 6.3” Tires, 3 Miles Max Range, and LED Headlights |
|
| 7 | Self Balance Scooter Seat Attachment 6.5” Two-Wheel Self Balancing Electric Scooter with LED Light Flash Lights Wheels |
|
| 8 | Self-Balancing Scooter Skin Hoverboard Sticker Adult e Scooter Electric Scooter for Adults Reflective |
|
| 9 | INMOTION E20 Electric Unicycle Hoverboard for Beginners – 14" Wheel, 900W Motor, 18.6 Miles Range, 12.5mph, UL2272 Certified – Lightweight & Safe Self-Balancing Scooter |
|
| 10 | 8.5” All Terrain Hover Board, Off Road Self Balancing Scooter with Bluetooth and LED Lights, UL2272 Safety Certified |
|
To maximize your hoverboard’s battery lifespan and ensure safe operation, follow these essential guidelines:
- Always charge in a well-ventilated area, away from flammable materials.
- Never leave a charging hoverboard unattended for extended periods, especially overnight.
- Disconnect the charger immediately once the battery is full, indicated by the charger’s LED turning green.
- Inspect the charger and charging port regularly for any signs of damage, such as frayed wires or bent pins.
- Avoid charging immediately after a long ride; allow the battery to cool down for about 15-30 minutes.
Adhering to these practices significantly reduces the risk of battery issues and enhances overall safety.
Recognizing Signs of Battery Damage
It’s important to be aware of the signs that your hoverboard battery might be damaged due to improper charging or other factors. These can include a noticeable decrease in ride time, the hoverboard not holding a charge, or the battery pack feeling unusually hot during or after charging. In more severe cases, you might observe swelling of the battery casing or a burning smell. If you notice any of these symptoms, discontinue use immediately and consult a professional for inspection or replacement. Continuing to use a damaged battery is a significant safety hazard.
Proper Storage for Battery Longevity
Beyond charging, how you store your hoverboard also impacts battery health. For long-term storage, it’s recommended to charge the battery to about 50-60% capacity, rather than fully charged or completely depleted. Store the hoverboard in a cool, dry place, away from direct sunlight and extreme temperatures. Periodically check the battery level every few months and top it up to the recommended storage charge if necessary. This prevents deep discharge, which can permanently damage lithium-ion cells.
Get our weekly buyer guide
Practical specs, not advice. Unsubscribe anytime.
Excellent advice on preventing overcharging! I had no idea about the specifics of lithium plating and how it affects the battery. I’ve been pretty good about unplugging it, but understanding the ‘why’ behind it makes me even more diligent. It’s great to have this kind of detailed information to keep my hoverboard safe and extend its life.
I appreciate the tips, especially about not leaving it plugged in too long. My only issue is that sometimes I forget to check the light and it’s hard to remember exactly when I plugged it in. Maybe a reminder on my phone would help. Still, it’s good to know why it’s important to disconnect it after 2-4 hours to avoid battery degradation.
Good info here. I always try to use the original charger, but sometimes I misplace it and grab a generic one. After reading about lithium plating and how sensitive those lithium-ion batteries are, I’m going to be way more careful. It makes sense why they emphasize using the charger that came with it. My board is still going strong after a year, and I want to keep it that way.
This guide was super helpful! I used to just leave my hoverboard plugged in overnight, thinking the built-in protection would handle everything. Now I know why my battery life seemed to be getting shorter. Definitely going to start unplugging it as soon as that indicator light turns green, usually after about 3 hours for mine. Thanks for the clear explanation!