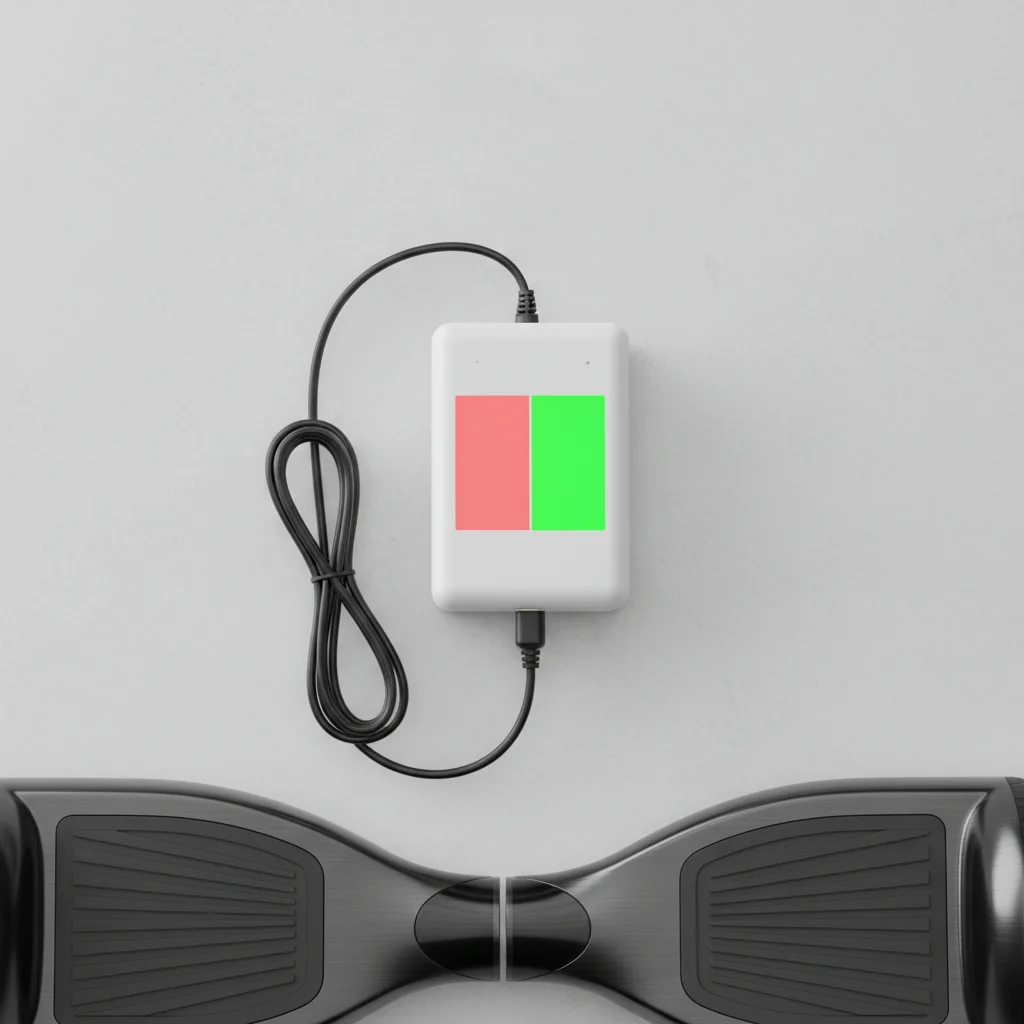
Understanding your hoverboard charger lights is crucial for safe and efficient charging. Typically, a hoverboard charger will have two main light indicators: red and green. A red light usually signifies that the hoverboard is currently charging, indicating power is flowing to the battery. Conversely, a green light generally means the hoverboard is fully charged or that the charger is connected to power but not to the hoverboard, or the hoverboard is not drawing power. Knowing these basic signals helps you monitor the charging process and prevent overcharging or undercharging, which can impact battery life and safety.
Decoding the Red Light Indicator
When you plug your hoverboard into the charger and the light turns red, it’s a clear signal that the charging process has begun. This red light indicates that the battery is actively receiving power. It’s important to ensure the connection is secure and that the red light remains steady throughout the initial charging phase. If the red light flickers or doesn’t appear, it could indicate a problem with the charger, the charging port, or the battery itself. Always refer to your hoverboard’s specific manual, as some models might have slight variations in their light indicators.
Understanding the Green Light Indicator
A green light on your hoverboard charger typically indicates one of two scenarios. Most commonly, it means your hoverboard battery is fully charged and ready to ride. Once the battery reaches its maximum capacity, the charger automatically switches to a maintenance mode or stops charging, and the light turns green. The second scenario is when the charger is plugged into a power outlet but not connected to the hoverboard, or if the hoverboard is connected but not drawing power (e.g., if the battery is already full or there’s an internal issue preventing charging). It’s a good practice to disconnect the hoverboard once the green light appears to prevent any potential strain on the battery, even though most modern chargers have overcharge protection.
Troubleshooting Common Charger Light Issues
|
Our Picks for the Best Hover Board in 2026
As an Amazon Associate I earn from qualifying purchases.
|
||
| Num | Product | Action |
|---|---|---|
| 1 | 8.5” All Terrain Hover Board, Off Road Self Balancing Scooter with Bluetooth and LED Lights, UL2272 Safety Certified |

|
| 2 | Self-Balancing Scooter Skin Hoverboard Sticker Adult e Scooter Electric Scooter for Adults Reflective |
|
| 3 | LIEAGLE Hoverboard, 6.5" Self Balancing Scooter Hover Board with Bluetooth Wheels LED Lights for Kids Adults |
|
| 4 | Self Balance Scooter Seat Attachment 6.5” Two-Wheel Self Balancing Electric Scooter with LED Light Flash Lights Wheels |
|
| 5 | K1 Go-Kart Seat Attachment for Self-Balancing Scooters, Adjustable Frame Fits 6.5"/8"/10" Boards, Easy Install, Kids & Family Fun (Scooter Not Included)–Classic Black |
|
| 6 | Gyroor Self Balancing Scooters Seat Attachment - Go Kart Conversion for 6.5'' to 10'' Self Balancing Scooters, Adjustable Frame Length, Perfect for Kids and Adults |
|
| 7 | Razor Hovertrax 2.0 Hoverboard, UL2272 Certified Self-Balancing Hoverboard Scooter, for Kids Age 8+ |
|
| 8 | K2 Self-Balancing Scooter Go Kart with Rear Shock Absorption, Balancing Scooter Seat Attachment for 6.5" 8" 10" Tires, Adjustable Length & Off-Road Wheel( (Not Including Balancing Scooter) |
|
| 9 | Hover-1 My First Self Balancing Scooter for Kids with 5 mph Max Speed, Dual 150W Motors, 6.3” Tires, 3 Miles Max Range, and LED Headlights |
|
| 10 | INMOTION E20 Electric Unicycle Hoverboard for Beginners – 14" Wheel, 900W Motor, 18.6 Miles Range, 12.5mph, UL2272 Certified – Lightweight & Safe Self-Balancing Scooter |
|
If your hoverboard charger lights aren’t behaving as expected, there are a few common issues to troubleshoot. First, check all connections: ensure the charger is firmly plugged into both the wall outlet and the hoverboard’s charging port. A loose connection can prevent proper charging. Second, inspect the charger and charging port for any visible damage, such as bent pins or frayed wires. Damage can interrupt the power flow. Third, try plugging the charger into a different outlet to rule out a faulty power source. If the light remains green when it should be red, or vice versa, it could indicate a problem with the charger itself or the hoverboard’s internal battery management system.
- Verify all cable connections are secure.
- Inspect charger and hoverboard port for physical damage.
- Test with a different power outlet.
- Consult your hoverboard’s user manual for specific light codes.
- Consider replacing the charger if issues persist.
When to Replace Your Hoverboard Charger
Knowing when to replace your hoverboard charger is essential for safety and optimal performance. If you consistently observe abnormal light behavior, such as a red light that never turns green after an appropriate charging period, or no light at all when connected, it’s a strong indicator of a faulty charger. Other signs include visible damage to the charger cable or brick, a burning smell, or excessive heat during charging. Using a damaged or malfunctioning charger can be dangerous, potentially leading to overcharging, battery damage, or even fire hazards. Always opt for a charger specifically designed for your hoverboard model or a high-quality universal charger with compatible voltage and amperage specifications.
Maximizing Hoverboard Battery Life Through Proper Charging
Proper charging practices, guided by understanding your charger lights, significantly extend your hoverboard’s battery life. Always charge your hoverboard in a cool, dry place, away from direct sunlight or extreme temperatures. Avoid completely draining the battery before recharging; partial charges are generally better for lithium-ion batteries. Once the green light indicates a full charge, disconnect the hoverboard promptly. While most modern chargers have overcharge protection, prolonged connection to a charger after full capacity can still put unnecessary stress on the battery over time. Following these guidelines, informed by the simple signals of your charger lights, will help ensure your hoverboard remains safe and performs optimally for longer.
Get our weekly buyer guide
Practical specs, not advice. Unsubscribe anytime.
The info about the red light meaning it’s charging was useful, but I wish there was a bit more detail on troubleshooting if the lights aren’t working as expected. My charger sometimes just stays green even when I know the battery is low, and I’m not sure if that’s a charger issue or a board issue. Still, it’s a good basic overview.
I’ve had my hoverboard for a while, and I’ve always wondered about the charger lights. This explained it perfectly, especially the part about the green light meaning it’s fully charged or not connected. I used to just unplug it after a few hours, but now I’ll wait for that green signal. Good info for anyone with a hoverboard.
This guide was super helpful! I always just plugged in my hoverboard and hoped for the best, but now I actually understand what the red and green lights mean. It’s great to know when it’s fully charged so I don’t overcharge it and mess up the battery life. Definitely makes me feel more confident about keeping my board in good shape.
Finally, a clear explanation! I was always worried about undercharging or overcharging my hoverboard, especially since I just got a new one. Understanding that a red light means it’s actively receiving power and a green light means it’s done is such a relief. This will definitely help me maintain my battery better.