If your hoverboard isn’t charging, the issue often lies with the charger, the charging port, or the battery itself. This guide will walk you through five common troubleshooting steps to diagnose and potentially fix the problem, helping you get back to riding without needing a professional repair.
Check the Charger and Outlet
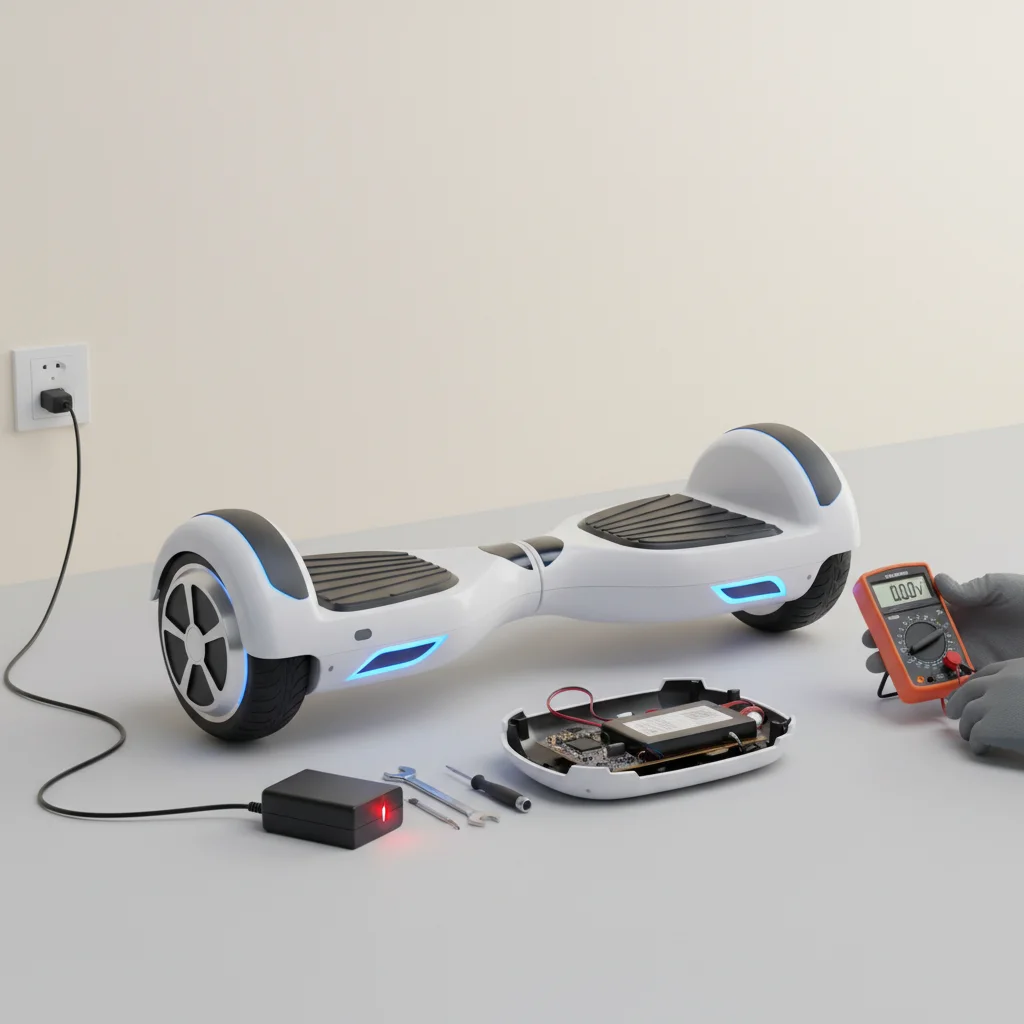
The first and most straightforward step is to ensure your charger is functioning correctly and the power outlet is active. Plug another device into the same outlet to confirm it’s supplying power. Next, inspect your hoverboard charger for any visible damage, such as frayed wires or bent pins on the charging plug. A damaged charger is a common culprit for charging issues. If you have access to a multimeter, you can test the charger’s output voltage to see if it’s within the specified range for your hoverboard model. If the charger is faulty, replacing it with a compatible, high-quality charger is often the solution.
Inspect the Charging Port
The charging port on your hoverboard can accumulate dirt, debris, or even sustain physical damage, preventing a proper connection. Carefully examine the port for any obstructions and use a small, non-metallic tool like a toothpick or a can of compressed air to gently clean it out. Also, check for bent or broken pins inside the port. If the pins are damaged, the port itself may need to be replaced, which can be a more involved repair. A loose connection here will prevent any power from reaching the battery.
Perform a Hard Reset
|
Our Picks for the Best Hover Board in 2026
As an Amazon Associate I earn from qualifying purchases.
|
||
| Num | Product | Action |
|---|---|---|
| 1 | Self-Balancing Scooter Skin Hoverboard Sticker Adult e Scooter Electric Scooter for Adults Reflective |

|
| 2 | Razor Hovertrax 2.0 Hoverboard, UL2272 Certified Self-Balancing Hoverboard Scooter, for Kids Age 8+ |
|
| 3 | K2 Self-Balancing Scooter Go Kart with Rear Shock Absorption, Balancing Scooter Seat Attachment for 6.5" 8" 10" Tires, Adjustable Length & Off-Road Wheel( (Not Including Balancing Scooter) |
|
| 4 | LIEAGLE Hoverboard, 6.5" Self Balancing Scooter Hover Board with Bluetooth Wheels LED Lights for Kids Adults |
|
| 5 | 8.5” All Terrain Hover Board, Off Road Self Balancing Scooter with Bluetooth and LED Lights, UL2272 Safety Certified |
|
| 6 | Hover-1 My First Self Balancing Scooter for Kids with 5 mph Max Speed, Dual 150W Motors, 6.3” Tires, 3 Miles Max Range, and LED Headlights |
|
| 7 | INMOTION E20 Electric Unicycle Hoverboard for Beginners – 14" Wheel, 900W Motor, 18.6 Miles Range, 12.5mph, UL2272 Certified – Lightweight & Safe Self-Balancing Scooter |
|
| 8 | Gyroor Self Balancing Scooters Seat Attachment - Go Kart Conversion for 6.5'' to 10'' Self Balancing Scooters, Adjustable Frame Length, Perfect for Kids and Adults |
|
| 9 | Self Balance Scooter Seat Attachment 6.5” Two-Wheel Self Balancing Electric Scooter with LED Light Flash Lights Wheels |
|
| 10 | K1 Go-Kart Seat Attachment for Self-Balancing Scooters, Adjustable Frame Fits 6.5"/8"/10" Boards, Easy Install, Kids & Family Fun (Scooter Not Included)–Classic Black |
|
Sometimes, a simple hard reset can resolve minor electronic glitches that prevent your hoverboard from charging. To perform a hard reset, first ensure the hoverboard is turned off and unplugged from the charger. Then, press and hold the power button for approximately 10-15 seconds until you hear a beep or see the lights flash. Release the button and try plugging in the charger again. This process can clear internal errors and allow the charging circuit to reset, potentially restoring normal charging function.
Test the Battery Connection
A loose or disconnected battery can prevent your hoverboard from charging, even if the charger and port are working. This step typically requires opening up the hoverboard, which should only be done if you are comfortable with basic electronics and have the right tools. Locate the battery pack and check all connections to ensure they are secure. Look for any signs of corrosion or damage on the battery terminals. If the battery itself appears swollen or leaking, it is severely damaged and must be replaced immediately. Always exercise caution when handling lithium-ion batteries.
- Ensure the hoverboard is powered off and unplugged.
- Carefully remove the bottom panel of the hoverboard.
- Locate the battery pack and inspect its wiring connections.
- Gently re-seat any loose connectors.
- Look for physical damage or swelling on the battery itself.
Consider a Battery Replacement
If all other troubleshooting steps fail, the battery itself is likely the problem. Hoverboard batteries, especially lithium-ion ones, have a finite lifespan and can degrade over time, losing their ability to hold a charge. If your hoverboard is several years old or has been frequently overcharged/undercharged, a new battery might be necessary. When replacing the battery, always purchase a high-quality, compatible battery specifically designed for your hoverboard model to ensure safety and optimal performance.Always follow the manufacturer’s instructions for battery replacement or consult a professional if you are unsure.
By systematically working through these five steps, you can often identify and resolve why your hoverboard isn’t charging. Remember to prioritize safety, especially when dealing with electrical components and batteries. If you’ve tried everything and your hoverboard still won’t charge, it might be time to seek professional repair or consider a new hoverboard.
Get our weekly buyer guide
Practical specs, not advice. Unsubscribe anytime.