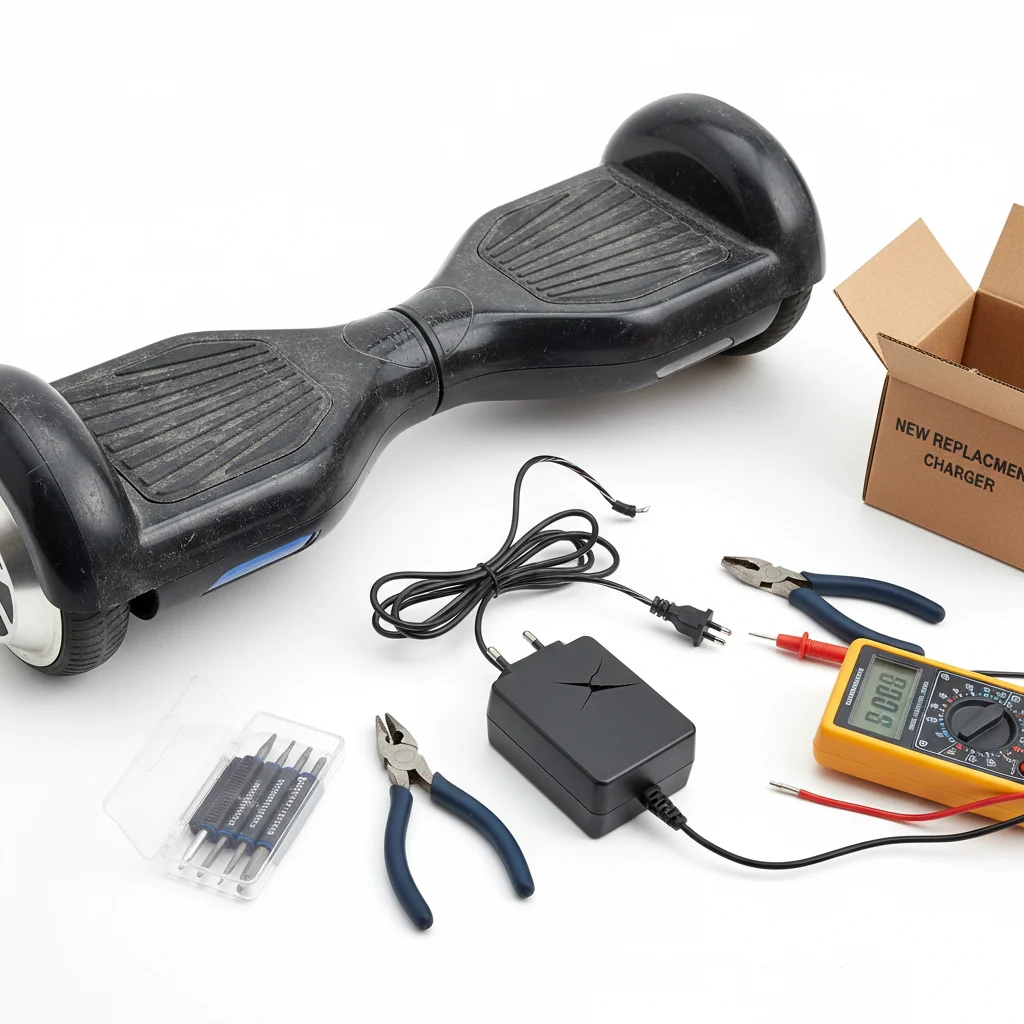
If your hoverboard charger isn’t working, it’s a common issue that can often be resolved with a few simple troubleshooting steps. There are seven primary reasons why your charger might not be functioning, ranging from a faulty power outlet to a damaged charging port on your hoverboard itself. Identifying the specific problem is crucial for a quick and effective fix, ensuring you can get back to riding without needing to replace the entire unit.
Check the Power Source and Connections
The first and most straightforward step is to verify your power source. Plug the charger into a different wall outlet to rule out a faulty socket. Ensure the charger’s power cord is securely connected to both the wall adapter and the charging brick. Loose connections are a frequent culprit for power interruptions. Also, inspect the entire length of the power cord for any visible damage, such as cuts, fraying, or kinks, which could prevent electricity from flowing properly.
Inspect the Charger’s Indicator Light
Most hoverboard chargers come equipped with an LED indicator light that signals its operational status. Typically, a green light indicates the charger is receiving power and ready to charge, while a red light often means it’s actively charging the hoverboard. If there’s no light at all, or if the light flickers erratically, it suggests an issue with the charger itself or its connection to the power supply. A completely dead light usually points to a faulty charger or a lack of power from the outlet.
Examine the Hoverboard’s Charging Port
The charging port on your hoverboard can accumulate dirt, dust, or debris over time, obstructing the connection with the charger. Carefully inspect the port for any foreign objects and gently clean it using a dry, soft brush or compressed air. Also, check for any bent or broken pins within the port, as these can prevent the charger from making proper contact. A damaged charging port often requires professional repair or replacement.
Test with a Different Charger (If Available)
|
Our Picks for the Best Hover Board in 2026
As an Amazon Associate I earn from qualifying purchases.
|
||
| Num | Product | Action |
|---|---|---|
| 1 | K1 Go-Kart Seat Attachment for Self-Balancing Scooters, Adjustable Frame Fits 6.5"/8"/10" Boards, Easy Install, Kids & Family Fun (Scooter Not Included)–Classic Black |

|
| 2 | Hover-1 My First Self Balancing Scooter for Kids with 5 mph Max Speed, Dual 150W Motors, 6.3” Tires, 3 Miles Max Range, and LED Headlights |
|
| 3 | INMOTION E20 Electric Unicycle Hoverboard for Beginners – 14" Wheel, 900W Motor, 18.6 Miles Range, 12.5mph, UL2272 Certified – Lightweight & Safe Self-Balancing Scooter |
|
| 4 | Razor Hovertrax 2.0 Hoverboard, UL2272 Certified Self-Balancing Hoverboard Scooter, for Kids Age 8+ |
|
| 5 | K2 Self-Balancing Scooter Go Kart with Rear Shock Absorption, Balancing Scooter Seat Attachment for 6.5" 8" 10" Tires, Adjustable Length & Off-Road Wheel( (Not Including Balancing Scooter) |
|
| 6 | Self-Balancing Scooter Skin Hoverboard Sticker Adult e Scooter Electric Scooter for Adults Reflective |
|
| 7 | 8.5” All Terrain Hover Board, Off Road Self Balancing Scooter with Bluetooth and LED Lights, UL2272 Safety Certified |
|
| 8 | LIEAGLE Hoverboard, 6.5" Self Balancing Scooter Hover Board with Bluetooth Wheels LED Lights for Kids Adults |
|
| 9 | Self Balance Scooter Seat Attachment 6.5” Two-Wheel Self Balancing Electric Scooter with LED Light Flash Lights Wheels |
|
| 10 | Gyroor Self Balancing Scooters Seat Attachment - Go Kart Conversion for 6.5'' to 10'' Self Balancing Scooters, Adjustable Frame Length, Perfect for Kids and Adults |
|
If you have access to another compatible hoverboard charger, testing it with your hoverboard is an excellent way to isolate the problem. If the second charger works, it confirms that your original charger is defective and needs to be replaced. Conversely, if the hoverboard still doesn’t charge with a known-good charger, the issue likely lies with the hoverboard’s internal components, such as the battery or charging circuit.
- Ensure the replacement charger has the correct voltage and amperage.
- Verify the charging port connector matches your hoverboard.
- Only use chargers designed for your specific hoverboard model.
- Avoid using generic chargers that don’t meet specifications.
Consider the Hoverboard Battery’s Condition
A non-responsive charger can sometimes be a symptom of a deeply discharged or faulty hoverboard battery. If the battery has been completely drained for an extended period, it might enter a protective state where it won’t accept a charge. In some cases, a battery can simply reach the end of its lifespan and fail to hold a charge. While less common, a severely damaged battery can also prevent the charger from functioning correctly as a safety measure.
Reset the Hoverboard
Sometimes, a simple reset of your hoverboard can resolve charging issues. The exact reset procedure varies by model, but it typically involves turning the hoverboard off, holding down the power button for a specific duration (often 5-10 seconds), and then releasing it. This can clear any minor software glitches that might be interfering with the charging process. Consult your hoverboard’s user manual for the precise reset instructions for your model.
When to Seek Professional Help or Replace Components
If you’ve gone through all the troubleshooting steps and your hoverboard charger still isn’t working, it might be time to consider professional repair or component replacement. A faulty charger is relatively inexpensive to replace, and you can often find compatible options online. However, if the issue is with the hoverboard’s charging port, battery, or internal circuitry, it’s usually best to consult a qualified technician. Attempting complex internal repairs without expertise can cause further damage or pose safety risks.